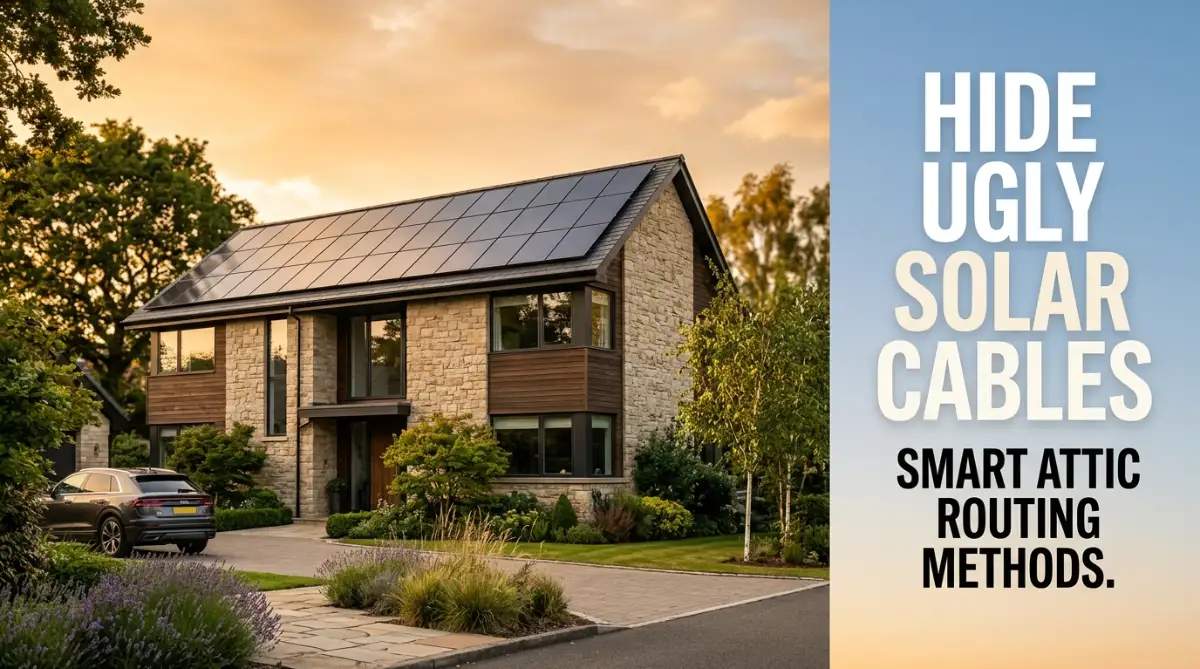
The Hidden Nightmare of Going Green: My Personal Battle with Ugly Wires
Staring up at my newly activated solar panels, my excitement instantly vanished when I saw a massive, ugly grey pipe running straight down my siding. The installers chose the easiest route for them, completely ruining the clean look of my home. If you are dealing with a similar mess right now, do not panic. I figured out exactly how to hide those eyesores up in the ceiling space, and I am going to show you how to fix it without damaging your property.
It looked absolutely awful. I felt a sudden, heavy drop in my stomach as I realized what the installation crew had done. They took the fastest, easiest path possible, completely ignoring how it ruined the outer appearance of my home. My wife was furious when she came outside to look at it, and honestly, I could not blame her one bit. We had spent so much money making our exterior look perfect, only for it to be ruined in a single afternoon.
Every single time I pulled my car into the driveway, those massive wires mocked me. The sleek, modern panels on the roof clashed terribly with the messy, commercial look of the exterior conduit. Some of my neighbors even started making subtle jokes about the new "utility pole" attached to my house. It was incredibly embarrassing.
I found myself worrying constantly about those exposed pipes and cables. What if a severe storm or a falling tree branch damaged the conduit? My mental peace was completely shattered, replaced by daily stress and frustration. I spent many nights tossing and turning in bed, desperately searching the internet for a way to fix this expensive mistake.
Going green was supposed to feel amazing and stress-free. Instead, this visual clutter brought nothing but daily annoyance. The reality is, many solar companies will not tell you about this ugly side effect until it is already bolted to your wall.
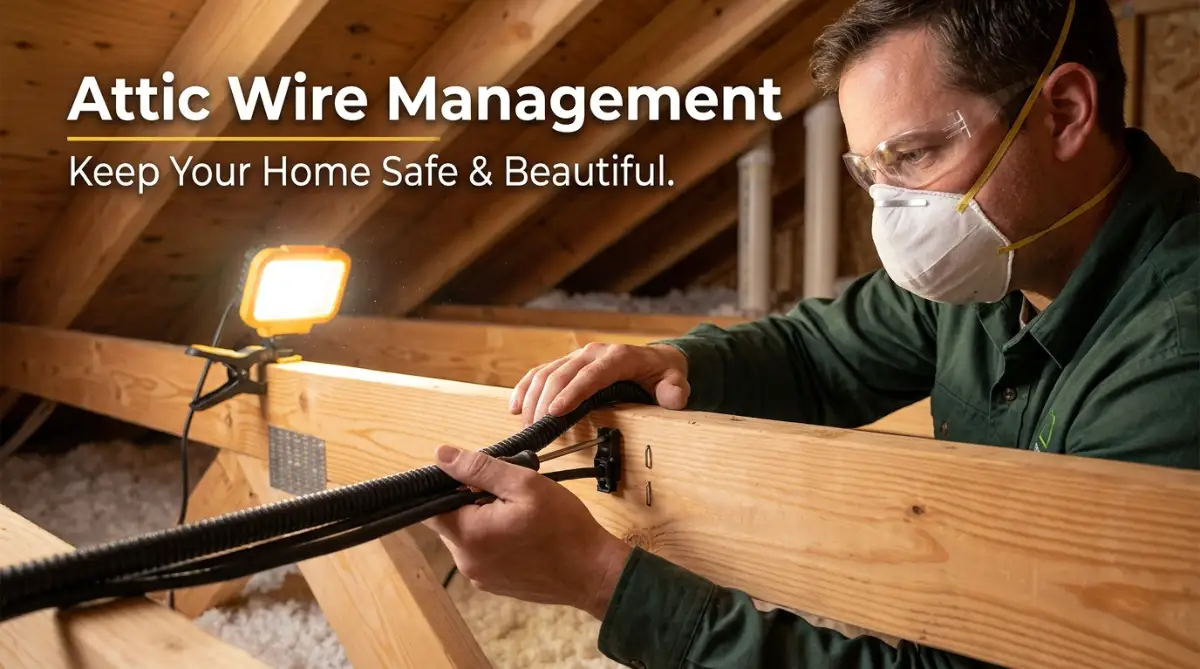
What You Will Learn Today (Action Plan):
- How to legally and safely move those ugly exterior solar pipes inside your house.
- The exact tools you need to drill through your wall's top plate without hitting plumbing.
- Why using a waterproof roof box (Soladeck) is the only way to prevent major ceiling leaks.
- The clever trick to pulling heavy wires through a wall cavity with zero damage.
Why Leaving Exterior Solar Cables is a Huge Mistake
When you leave thick cables exposed on the outside of your home, you are inviting trouble from the weather. Extreme heat from the summer sun can degrade the protective casing over time. Freezing winter temperatures can make exterior plastics brittle and prone to cracking. You constantly have to monitor the condition of the conduit.
Then there is the issue with Homeowner Associations (HOAs). If you live in a strict neighborhood, ugly exterior wires can quickly lead to warning letters and annoying fines. You find yourself fighting unnecessary battles just because an installer was too lazy to run the wires properly. It drains your energy and steals the joy of producing your own clean power.
Selling your house also becomes a bigger challenge. Potential buyers look at homes with a very critical eye. When they see a giant gray pipe running straight down the middle of a beautiful brick or siding wall, it raises red flags. They might assume the whole solar system was installed cheaply or incorrectly.
Taking Control: The Choice to Route Through the Attic
So, what is the best way to regain your home's curb appeal? The answer lies right above your head. By routing those ugly solar cables through your existing attic space, you can completely hide the mess. It is the smartest way to protect the wires and restore the beauty of your house.
I know the idea of working inside an attic sounds intimidating. It is often hot, dusty, and full of insulation. But taking the time to plan an interior route changes everything. It completely removes the eyesore from your exterior walls.
Below, I am going to walk you through exactly how this process works. Whether you are hiring a professional to redo the wiring or you are a highly skilled DIY enthusiast, understanding these steps is essential. You will learn the right way to manage this project without causing damage to your home.
Step-by-Step Educational Guide to Attic Routing
Step 1: Assessing the Unseen Obstacles Above Your Ceiling
Before anyone starts drilling holes or moving wires, a deep inspection of the attic is mandatory. You cannot just guess where the wires should go. You need to understand the exact layout of the wooden joists, the thickness of the insulation, and the location of existing home utilities.
First, grab a powerful flashlight and carefully climb up your attic ladder. You are looking for a clear, unobstructed path from the roof section where the panels are located, all the way to the side of the house where your main electrical panel sits. This path must be safe and accessible.
Look closely at the floor of the attic. Are there existing air conditioning ducts blocking your way? Are there plumbing vent pipes crossing exactly where you need to run the heavy solar cables? Identifying these hurdles early will save you massive headaches later on.
You also need to find the specific wooden beam known as the "top plate." This is the horizontal piece of wood that sits exactly at the top of your interior or exterior wall framing. Finding this exact piece of wood from up in the attic is the secret to a perfect, hidden wire drop.
Quick Guide: Navigating Hidden Attic Obstacles
Before you start drilling, keep an eye out for these common roadblocks up there. Here is how I handle them:
| The Obstacle | Why It Is Annoying | My Simple Workaround |
| :--- | :--- | :--- |
| Thick Blown-in Insulation | Hides the wooden joists, making you step through the ceiling. | Bring a wide piece of plywood to lay across the joists so you have a safe sitting platform. |
| HVAC Ductwork | Blocks the direct path for your conduit. | Never squish a duct. Route your flexible metal pipe slightly higher and secure it to a roof truss instead. |
| Plumbing Vent Pipes | They run straight up through the roof, blocking your wire drop. | Shift your wire drop to the next available wall cavity cavity spacing (usually 16 inches over). |
A Quick Reality Check: The Myths of Attic Wiring
Many people believe a few common myths about running heavy solar lines inside an attic space. Let us clear up the confusion right now.
- Myth: Solar wires will easily start a fire in the attic if they touch insulation.
- Reality: Properly rated solar cables (like PV wire) inside the correct protective metal conduit are incredibly safe. They are designed to handle high heat safely.
- Myth: You have to rip down your interior drywall to route wires from the attic.
- Reality: By carefully fishing the wires down an empty wall cavity, you can often drop them straight to your main panel without destroying your living room walls.
Step 2: Securing the Transition from the Roof to the Inside
The most sensitive part of hiding solar cables is getting them off the roof and inside the house without creating a roof leak. This transition must be handled with extreme care and proper waterproofing materials. Water damage is a homeowner's worst nightmare, so we must get this right.
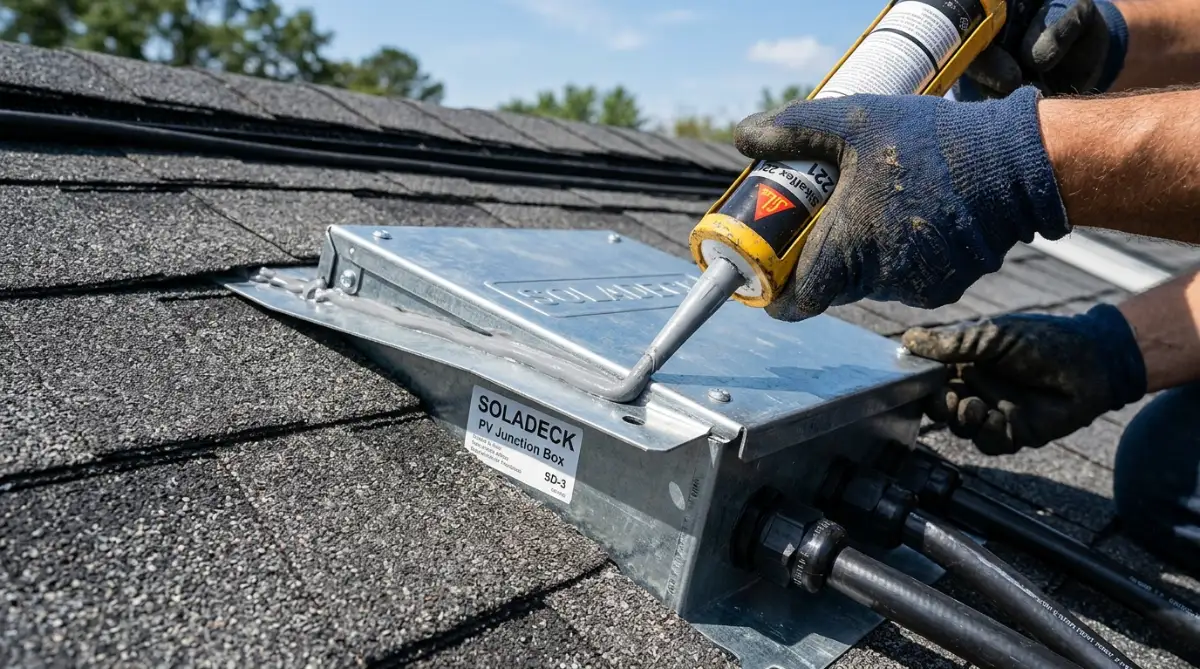
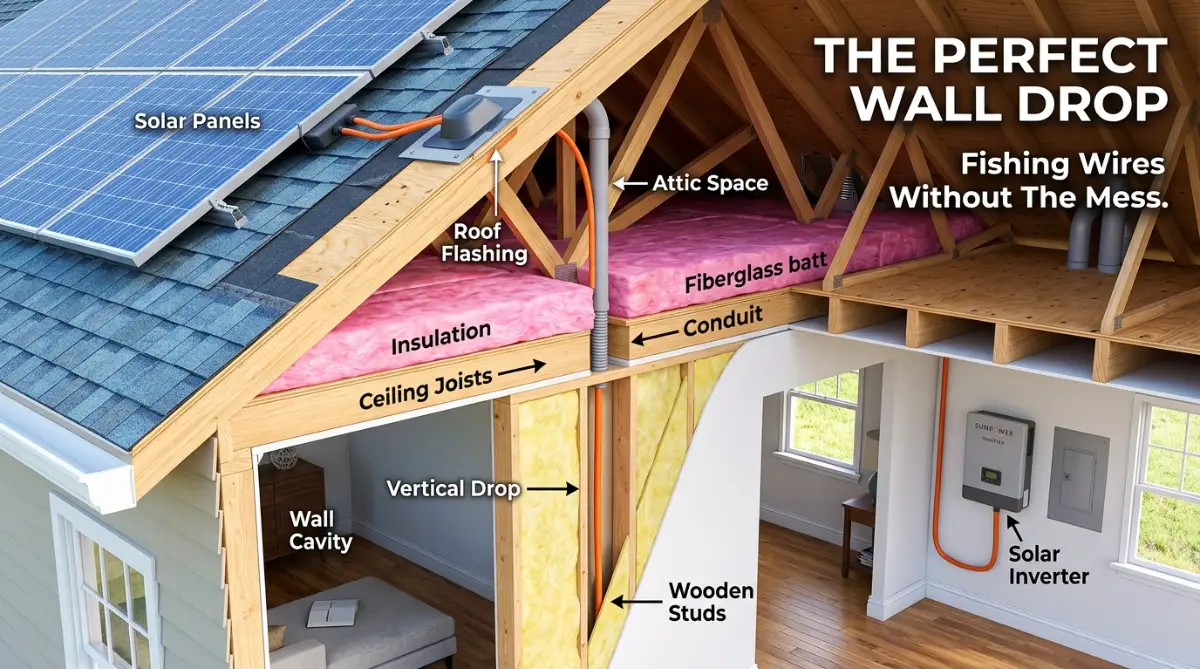
Installers typically use a specialized, waterproof metal box called a Soladeck. This box is mounted directly onto the roof deck and slides seamlessly under your existing roof shingles. It creates a perfectly sealed entry point for the wires to pass through the wood and enter the dark attic space below.
Watch This Expert Demonstration on Sealing Roof Penetrations
If you want to see exactly how a waterproof junction box is installed on a roof to prevent massive water leaks, check out this incredible visual guide below.
Once the wires are safely inside the attic junction box, they need to be transitioned into a protective metal conduit. Depending on your local building codes, running exposed PV wire across the attic floor is usually not allowed. The wires carry high-voltage DC electricity, which requires serious physical protection.
Flexible metallic conduit is often the best choice for this task. It is much easier to bend and route around tight corners than rigid metal pipes. You simply feed the ugly black solar cables through this flexible metal armor. This ensures they are safe from any rodents that might sneak into your attic looking for a snack.
My Personal Lesson in the Attic
I learned the hard way that you should never go into an attic without a high-quality headlamp and a heavy-duty dust mask. I bumped my head incredibly hard on a wooden rafter because I was trying to hold a standard flashlight in my mouth while reaching for a thick solar cable. Always wear the right gear, keep both of your hands completely free, and watch out for exposed roofing nails above your head!
Step 3: Creating a Safe Path Across the Joists
Now that the cables are inside their protective metal casing, you have to move them across the length of the attic. You cannot just lay the heavy conduit directly on top of your fluffy ceiling insulation. It needs to be properly secured to the wooden structure of the house.
The best practice is to run the conduit perpendicular to the ceiling joists, attaching it securely with metal pipe straps. These straps hold the conduit firmly in place, ensuring it never shifts or falls. Always secure the conduit every few feet. This keeps the installation neat and prevents anyone from accidentally tripping over it in the future.
If your attic has a solid wooden floor built over the joists, the job becomes much easier. You can run the conduit along the walls or secure it to the side of the heavy roof trusses. Just make sure the path does not block any attic vents or exhaust fans. Proper airflow in an attic is essential for the health of your roof.
Comparing Your Wiring Options: A Quick Look
To help you understand why this effort is so rewarding, let us look at a simple comparison between the two main methods.
Step 4: Fishing the Wires Down to the Main Panel
This is where the real magic happens. You have successfully routed the cables across the attic. Now, you need to get them down to your main electrical panel, which is usually located in the garage or on a lower exterior wall. This process is commonly called "fishing" the wires.
First, you need to locate the exact top plate of the wall cavity that sits directly above your electrical panel. This requires careful measuring. You can measure the distance from a known point, like a nearby window, both inside the house and up in the attic. Once you are absolutely sure you have the right spot, it is time to drill.
You will need a powerful drill and a long wood-boring bit, usually called a spade bit or an auger bit. Carefully drill a hole straight down through the wooden top plate. Before drilling, double-check that there are no existing electrical wires or water pipes running through that exact spot. Drilling blindly is a recipe for a very expensive disaster.
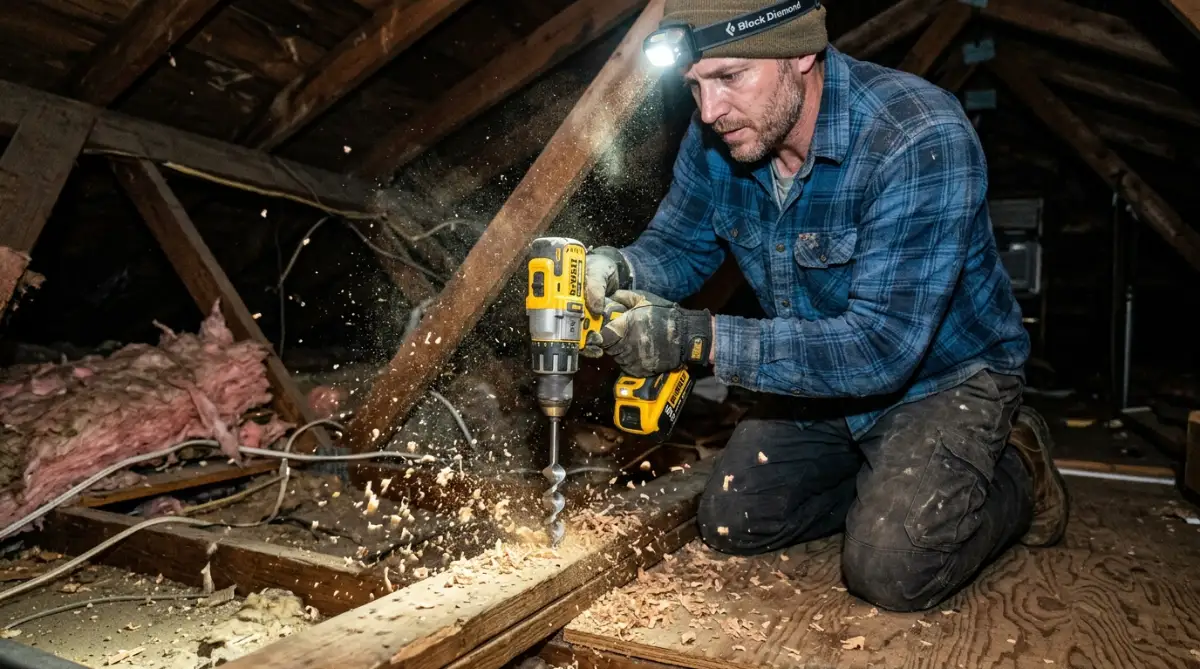
Once the hole is clear, feed a specialized tool called a fiberglass fish tape down into the dark wall cavity. Send it all the way down until it reaches the area behind your electrical panel. Have a helper standing by the panel downstairs to listen for the tool hitting the bottom.
Communicating with Your Helper
Trying to fish a wire by yourself is incredibly frustrating. Always use a helper. While you are sweating in the attic pushing the tape down, your helper needs to tell you if it is getting stuck. Sometimes, wall cavities have horizontal wooden fire blocks inside them. If you hit a fire block, you cannot just push through it.
If a fire block is in the way, you have a few choices. You can use an extremely long, flexible drill bit from below to drill through the hidden block. Alternatively, you might have to cut a small, neat hole in the drywall to bypass the block, which you can easily patch and paint later. It is a minor inconvenience for a permanently beautiful exterior.
Step 5: Pulling the Heavy Cables Through
When your helper successfully grabs the end of the fish tape at the bottom, the real heavy lifting begins. You need to attach your solar cables securely to the top end of the fish tape up in the attic. Use strong electrical tape to bind them tightly together. Make the taped connection as smooth and streamlined as possible so it does not snag on any wood splinters inside the wall.
Now, your helper will slowly and steadily pull the fish tape down from the bottom. At the same time, you must carefully guide the cables into the hole from the top. Do not force or yank the wires aggressively. If they get stuck, pull them back up an inch, twist slightly, and try again.
Working together with a steady rhythm is the absolute key to success here. Once the wires safely emerge at the bottom near the electrical panel, you can all breathe a massive sigh of relief. The hardest part of the job is officially over.
Real-Life Pro Tip: The Soap Trick
When my buddy and I were pulling the thick PV wires down my garage wall, they got tightly jammed about halfway down. Instead of yanking and tearing the wire jackets, we pulled them back up into the attic and squirted a tiny bit of liquid dish soap on the nose of the taped bundle. The wires slid right past the wooden snag smoothly on the next try. Sometimes, working smarter beats working harder!
Step 6: Sealing the Envelope for Energy Efficiency
Grab a can of expanding fire-blocking foam from your local hardware store. Carefully spray this foam around the cables where they pass through the wooden top plate. The foam will expand rapidly, completely sealing the gap. It blocks air leaks, stops bugs from crawling down your walls, and provides a necessary fire barrier.
It is also important to double-check the roof entry point one last time before coming down. Ensure the Soladeck box is tightly sealed and no debris was left behind on the roof shingles. A clean, well-sealed job guarantees you will not be dealing with random water drips during the next heavy rainstorm.
By taking these precise, calculated steps, you transform an ugly, stressful solar installation into a seamless upgrade for your home. You regain the beautiful exterior you love, while still enjoying the amazing benefits of clean, renewable energy every single day. You no longer have to cringe when you pull into your driveway, and your neighbors will be deeply impressed by how perfectly hidden your system is.
Next-Level Strategies for a Flawless Inside Wiring Job
Getting those heavy black wires off your beautiful exterior walls is an amazing feeling. However, making sure they stay perfectly safe inside your dark ceiling space requires a bit of extra planning. You want this setup to last for decades without a single issue.
One of the smartest things you can do before starting this project is mapping out the entire run on a piece of paper. Do not just climb up the ladder and hope for the best. Measure the exact distance from the roof entry point to the wall drop.
Always buy a metal conduit that is at least one size larger than you think you need. Trying to shove thick, stiff electrical cables through a perfectly sized pipe is a total nightmare. Giving the cables some extra breathing room makes pulling them a hundred times easier.
You also need to think about the intense heat up there. During the middle of summer, a dark ceiling space can easily reach over 130 degrees Fahrenheit. Because of this extreme heat, you must never use standard indoor residential wiring for this project.
Always insist on using heavy-duty, PV-rated solar cables. These specific cables are built to withstand incredibly high temperatures without melting or degrading. Your safety is non-negotiable here.
Another massive secret the pros use involves securing the metal conduit. Do not just let it rest directly on top of your fluffy ceiling insulation. When you attach the pipe straps, secure them directly to the solid wooden joists.
This keeps the heavy pipes lifted and prevents them from crushing your insulation. Crushed insulation loses its ability to keep your house cool in the summer. Speaking of keeping things cool, managing airflow in this area is a great way to protect your new wiring and your roof.
If you are already up there working, it is a great time to think about lowering attic temperatures effectively. Keeping that space heavily ventilated stops your brand-new solar wires from constantly baking in trapped oven-like heat.
The Magic of Fire-Blocking Foam
We talked briefly about sealing holes earlier, but I need to explain exactly how important this step really is. When you drill a hole down into an interior wall cavity, you are basically creating a hidden chimney inside your house.
If a fire ever starts inside the wall, those open holes allow oxygen to rush in. This feeds the flames and lets the fire spread instantly to the roof. You must seal every single drilled hole with orange fire-block foam.
Do not use the cheap, standard yellow gap-filler foam from the hardware store. The orange fire-blocking foam is specially formulated to expand and create a hard, fire-resistant barrier. Following strict national electrical safety guidelines is the only way to sleep peacefully at night.
Sealing these gaps also protects your monthly power bill. If you leave open holes in the wooden top plate, your expensive air conditioning will literally get sucked up into the ceiling. You end up paying huge money to cool down empty space instead of your living room.
Treat this step as a primary way of maintaining your home's thermal envelope. A perfectly sealed house keeps your family comfortable and forces your energy system to work much less. It is a win-win situation for both your wallet and your comfort.
The Costly Disasters You Must Avoid at All Costs
I have seen plenty of homeowners try to rush through this project on a Saturday afternoon. They skip the planning phase and jump straight into drilling holes blindly. This is exactly how tiny mistakes turn into incredibly expensive disasters.
Imagine pushing a heavy drill bit down into your wall cavity, only to hear a loud hiss followed by the sound of rushing water. Drilling blindly into an unseen PVC plumbing pipe will instantly flood your downstairs living area. Always use a high-quality magnetic stud finder and wall scanner before you ever pull the drill trigger.
You have to know exactly what is hiding behind your drywall. Some older homes have very unpredictable internal structures. You might run into unexpected metal brackets, older cloth wiring, or solid wooden fire blocks.
If you hit a solid block of wood halfway down the wall, do not try to force a heavy metal drill bit through it from an awkward angle. You will almost certainly blow a massive hole straight through your painted living room wall. Patching drywall and matching old paint colors is incredibly frustrating.
Instead, take a deep breath and accept that you might need to cut a small, neat access square in the drywall. It is much easier to patch a perfect square than to fix a jagged, blown-out hole.
The Nightmare of the Leaky Roof Box
Another massive trap people fall into involves the roof transition. Trying to save money by using cheap plastic junction boxes on the roof is a terrible idea. The hot summer sun will bake that cheap plastic until it becomes brittle and cracks open.
Once that box cracks, heavy rainwater will pour straight down the heavy wires and directly into your ceiling. I have seen water travel along wires for ten feet before finally dripping down and ruining a beautiful living room ceiling. Water damage is sneaky and aggressively destructive.
You must use a professional-grade, metal Soladeck box designed specifically for roofing penetrations. Learning the correct methods for preventing severe roof leaks will save you thousands of dollars in home repairs. Always slide the metal flashing completely under the existing shingles to guide rainwater safely away.
Choosing the Wrong Path for the Conduit
Sometimes, installers try to take a shortcut by running the heavy metal conduit right across the attic access door. They think it saves a few feet of wire. This is a remarkably bad choice.
The next time an AC repairman needs to climb up there, they will end up stepping directly on your expensive solar lines. Always route your protective pipes tightly along the outer edges of the roof framing. Keep the middle walking path completely clear of any obstacles.
This simple planning step makes future home maintenance completely stress-free. If you are ever exploring various energy options on our main home page, you will notice that the best home upgrades are the ones you never trip over. Keep it clean, keep it tucked away, and keep it safe.
Your Game Plan for a Perfect Solar Setup
You do not have to settle for an ugly, industrial-looking house just because you wanted to save money on electricity. You have the power to demand a better, cleaner installation. Hiding those thick cables inside your ceiling space is absolutely the smartest choice you can make for your property value.
If you are planning to hire a professional solar company, make sure you ask them about an internal wire drop before you sign any contracts. Get it clearly written on the official work order. Do not let a lazy installer talk you out of it just because it takes them an extra hour of labor.
If they claim it is impossible, politely ask them to explain exactly why. Usually, they just do not want to deal with the hot insulation. A truly skilled electrician knows advanced wall framing techniques and will happily hide the wires for a small extra fee. You can easily research these advanced wall framing techniques yourself so you know exactly what questions to ask them.
For the brave DIY homeowners out there, tackle this job with extreme patience. Buy the best tools you can afford, especially a high-quality fiberglass wire-fishing rod. Work with a trusted friend who can help guide the cables from the bottom while you push from the top.
Take your time when sealing the roof penetrations. Double-check your measurements before drilling into any top plates. If you follow these exact steps, you will transform the outside of your house completely.
You can finally enjoy all the financial benefits of clean energy without sacrificing the beautiful curb appeal of your home. You will smile every single time you pull into your driveway, knowing the messy work is perfectly hidden away from the world.
Even if you are just looking into temporary outdoor energy setups right now, understanding how to manage thick cables properly is a fantastic skill to learn. A clean home is a happy home, inside and out.
Common Questions About Hiding Solar Cables
Does routing wires inside void my roof warranty?
As long as the roof penetration is done correctly using approved metal flashing boxes like a Soladeck, your warranty remains perfectly safe. Most roofing manufacturers actually prefer this method over drilling dozens of holes for an exterior conduit pipe. Just ensure you use high-quality roofing sealant under the shingles.
Do I need a special permit for attic wiring?
Yes, modifying the path of high-voltage solar cables usually requires an updated electrical permit from your local city office. An inspector will need to verify that you used the correct fire-blocking foam and protective metal conduit. It is a very simple inspection that keeps your home insurance valid.
Can mice chew through my hidden solar cables?
They absolutely cannot chew through the cables if you run them inside a flexible metallic conduit. This metal armor provides a totally bite-proof barrier against rodents and squirrels. Never leave thick electrical wires exposed across your ceiling joists without this metal protection.
How much extra does an internal wire drop cost?
If you are paying an installation crew, requesting an internal wire run usually adds around $300 to $500 to the total bill. This covers the extra labor time spent in the hot ceiling space and the cost of the metal junction boxes. It is an incredibly small price to pay for a permanently beautiful exterior.
Can I run the wires down the outside wall inside a rain downspout?
No, you should never hide high-voltage electrical wires inside a gutter downspout. Downspouts are meant for heavy water flow, and mixing constant water with electrical lines is incredibly dangerous. Always keep your electrical systems completely separate from your home's drainage system.
My Final Thoughts for Your Project
I know exactly how frustrating it feels to see your home's exterior ruined by lazy wiring jobs, because I lived through that exact nightmare. Taking the time to route these cables properly completely changed how I feel about my house today. I promise you, the few hours of dusty work up in the ceiling will reward you with decades of pride every time you look at your clean, wire-free walls.
Disclaimer: The information provided in this blog post is for educational and informational purposes only. Working with high-voltage solar equipment and drilling into home structures can be dangerous. Always consult with a licensed electrician, structural professional, or your local building authority before attempting any electrical modifications or roof penetrations.